
Accessing YoDa
There are three ways to interact with YoDa and each of them has some limitations and capabilities:
- YoDa web portal
- Network drive in your file explorer
- YoDa Command Line Interface (CLI) which is called iCommands
For using the YoDa web portal, type in the following web address in your browser; https://geo.yoda.uu.nl. After you have filled in your e-mail address, internal UU users (@uu.nl & @students.uu.nl) will need to provide their Solis password and multifactor authentication method, and external users will need to provide their chosen password for YoDa.
When you prefer interacting with YoDa in a network drive in your file explorer, use the web address which is slightly different; https://geo.data.uu.nl. Besides this address, you also need a Data Access Password for logging into YoDa. Later in this manual, describes how a Data Access Password can be generated. In Windows, MacOS, and Linux, a mounting to the YoDa network drive in the default file explorer can be created.
When you like to make use of iCommands, you will need to install the iCommands software and create a configuration file that will identify you as a user and connect you to the Geosciences YoDa instance. Later in this manual, step-by-step instructions will be given on how to do this.
In the network drive, you work with your files just as you normally would do while using your file explorer. In the website portal, you can arrange who gets access to your data, archive data, and (if so desired) publish data. Using iCommands you can interact with YoDa from your data analysis code to process your data. Also, iCommands have some extra capabilities to handle large datasets and transfer data faster than the other two options.
In the following sections, an overview of each method will be presented to help you choosing the way that suits you for your work.
On the YoDa web portal, you can see the research group (folders) that you have access to and can perform actions on. If you log in to the YoDa portal and click on the ‘Research’ tab and open one of the main research folders, the contents of that folder will be displayed, depending on the folder structure used to place the files in YoDa.
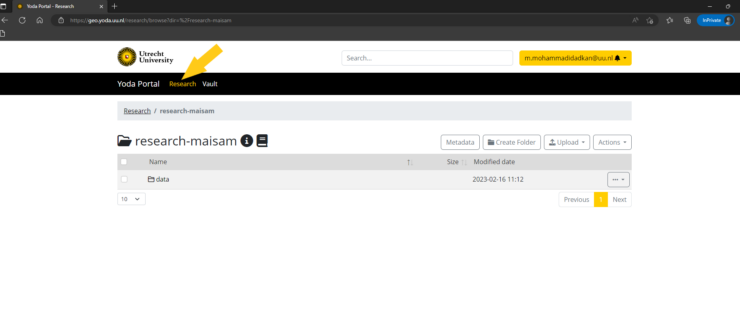
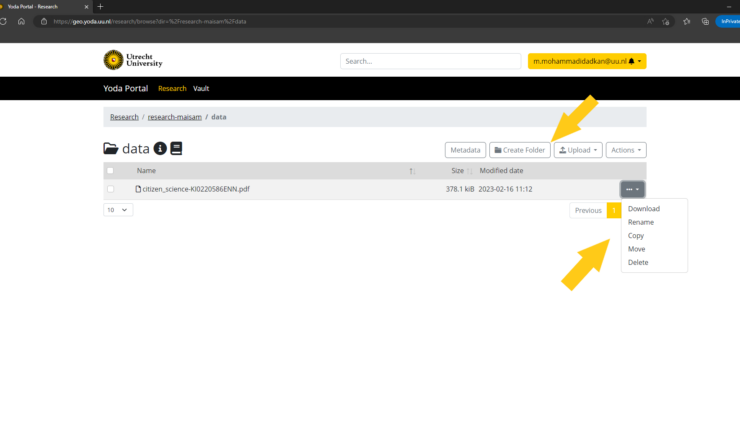
It is possible in the web portal to upload and download individual or multiple files, or a folder containing files. Also basic operations like create, delete, rename, move, and copy files or folders can be executed using the buttons on the tab menu on the right side and in the data object menu, which can be found clicking on the three dots button at the right in the same row as where the file or folder is mentioned.
Next to the name of the research group, you will find 4 buttons – metadata, create folder, upload, and actions.
- By clicking the ‘metadata’ button, a metadata form appears. You can insert metadata in every subfolder if needed, however, it is mostly done in the main folder.
- By pressing the ‘create folder’ button, a folder will be created in the folder you are in now, and you will be able to give in the folder name.
- By choosing the upload button, you can choose between uploading a (single) file from your local device to upload into the Yoda folder or uploading a folder with one or more (subfolders with) files from your device into the YoDa folder. It is also possible to drag and drop one or more files or a folder directly from your computer into the screen in the area under the grey bar.
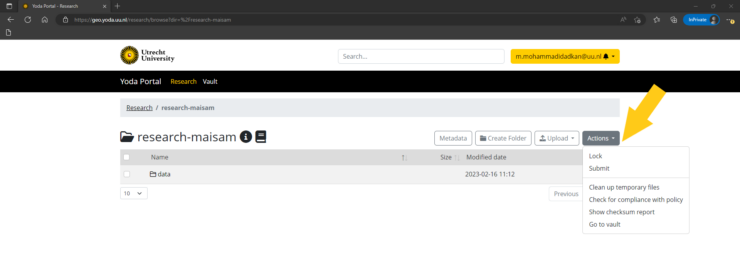
- By clicking on actions, you will find the options; lock, submit, clean up temporary files, check for compliance with policy, show checksum report, and go to the vault. By pressing lock all the files in that folder will become read-only, clicking ‘submit’ will offer the current folder with data to be included in the vault (which is an intermediate step to publish this data), and by selecting ‘go to vault’ you will be redirected to the associated vault folder.
In addition, you find under actions options to clean temporary files (like thumb.db or _DS.Store), check included file formats for policy compliance, and retrieve checksum reports.
Besides using the web portal, it is also possible to create a network share for exchanging data between your computer and YoDa. To use a network share with YoDa, you have to create a Data Access Password (DAP) first. This is a temporary password that can be used in combination with your e-mail address to create a connection session with YoDa. The password is valid for 30 days and after that, you need to create a new one. You can generate a data access password in the YoDa web portal following the data access password instruction.
Now you can use this password to configure and connect the YoDa network drive to your system. The process of configuring the YoDa network drive is different for Windows, Mac, and Linux and you can find the instructions for each of them on the YoDa website. Using the network share, you can interact with YoDa in the same way as with other attached local and/or network drives. Keep in mind that using the YoDa network drive, you can only perform basic tasks related to the data itself, like uploading and downloading, creating a folder, copying, moving, renaming, etc. But for adding metadata, submitting data, publishing data, etc. you have to make use of the YoDa web portal.
iCommands is useful for handling large datasets or interacting with YoDa while you are coding. iCommands only works on a handful of Linux operating systems. If you are a Windows user, the easiest way to use iCommands is to install and configure Windows Subsystem for Linux (WSL).
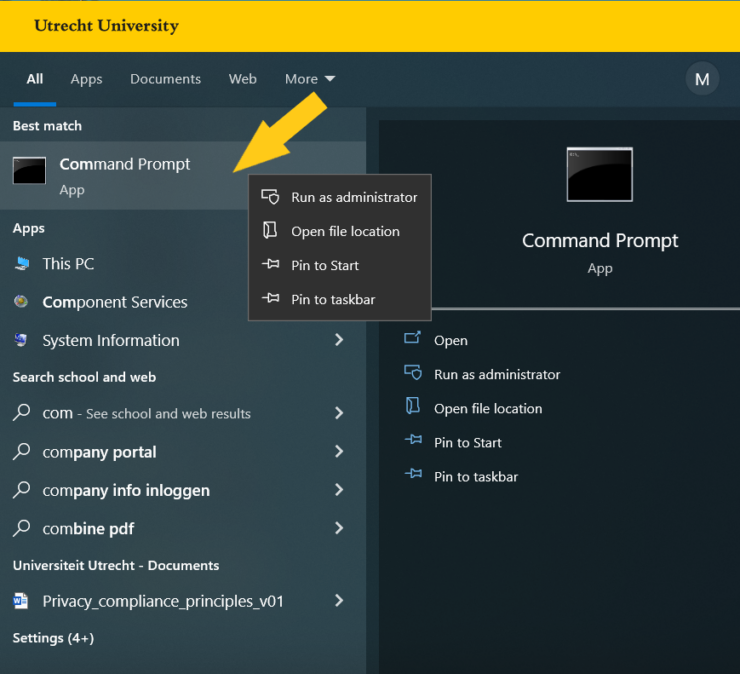
To start installing iCommands, open a command prompt as an administrator as is shown below:
⚠️ If you don’t have local admin access on your UU laptop, contact ITS to assign local admin permissions to you
Then, follow the steps below:
- Install Ubuntu 18.04 on WSL
wsl --install -d Ubuntu-18.04
After you have completed the installation, you will be asked to choose a username and password for Ubuntu and restart the system. Then you can find the Ubuntu CLI environment by searching “ubuntu” on your search bar.

- Install iCommands on Ubuntu (copy and paste each command separately) by opening the Ubuntu app and type:
sudo apt-get update
sudo apt-get install -y --only-upgrade ca-certificates
wget -qO - https://packages.irods.org/irods-signing-key.asc | sudo apt-key add -
echo "deb [arch=amd64] https://packages.irods.org/apt/ bionic main" | sudo tee /etc/apt/sources.list.d/renci-irods.list
sudo apt-get update
sudo apt -y install irods-runtime=4.2.11-1~bionic irods-icommands=4.2.11-1~bionic
- Prevent automatic upgrades of these two packages
sudo apt-mark hold irods-runtime i
- Network tuning, ad hoc and permanent
echo "120" | sudo tee /proc/sys/net/ipv4/tcp_keepalive_time
echo "30" | sudo tee /proc/sys/net/ipv4/tcp_keepalive_intvl
echo "net.ipv4.tcp_keepalive_time=120" | sudo tee -a /etc/sysctl.d/99-sysctl.conf
echo "net.ipv4.tcp_keepalive_intvl=30" | sudo tee -a /etc/sysctl.d/99-sysctl.conf
- Create a config file:
Make the “.irods” directory:mkdir ~/.irods
If the directory already exists, you might get an error. Then run the following command to make the config file:
touch ~/.irods/touch irods_environment.json
- Open and modify the config file
nano ~/.irods/irods_environment.json
Copy the following text (including the brackets) in there. This config file is only for using the YoDa instance of the faculty of geosciences:
{
"irods_host": "geo.data.uu.nl",
"irods_port": 1247,
"irods_home": "/nluu11p/home",
"irods_user_name": "exampleuser@uu.nl",
"irods_zone_name": "nluu11p",
"irods_authentication_scheme": "pam",
"irods_encryption_algorithm": "AES-256-CBC",
"irods_encryption_key_size": 32,
"irods_encryption_num_hash_rounds": 16,
"irods_encryption_salt_size": 8,
"irods_client_server_negotiation": "request_server_negotiation"
}
and replace “exampleuser@uu.nl” with your UU email address (or the email address that you are registered in YoDa) and save it (ctrl+x, y, and 2 times press enter).
- Login to YoDa via iCommands:
If you have done all the above steps successfully, you can login to YoDa via iCommands using:iinit
and fill in your data access password where it is asked.
⚠️ Keep in mind that while you are typing the password on the command line, it does not show anything on the screen (dots, asterisks, bullet points, or similar characters).
Now you have access to YoDa via iCommands, and you can start using the standard iRODS commands to interact with YoDa.
Back to the YoDa User Manual Main Page
Read How to Store, Share, Publish, & Archive Data with YoDa