7-Zip Archive Options
7-Zip is our recommended tool for creating file and folder archives (compressed files), we suggest it for the many options available in the archive interface.
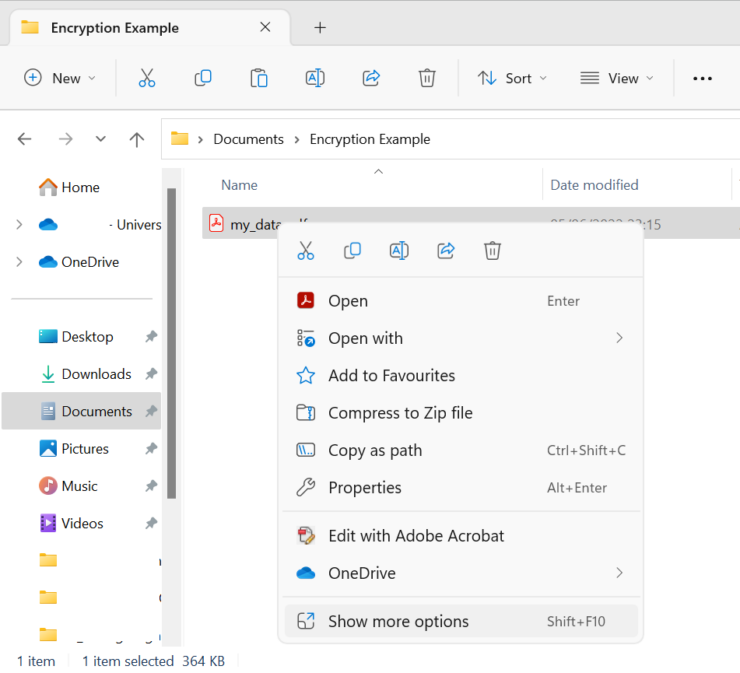
With 7-Zip already installed, you should have the 7-Zip context menu when you right click on files in the File Explorer. Right click on the file(s) you want to compress/archive, navigate to the 7-Zip menu, and click add to archive.
For simplicity:
- Archives are a way to abstract files and folders from the file system into a single file.
- Compressed files are archives that have also had an algorithm applied that saves storage space on the drive.
Windows 11 has changes the right click menu, in order to see the 7-Zip menu at the time of writing requires clicking on the “Show more options” button at the bottom.
Archive file formats
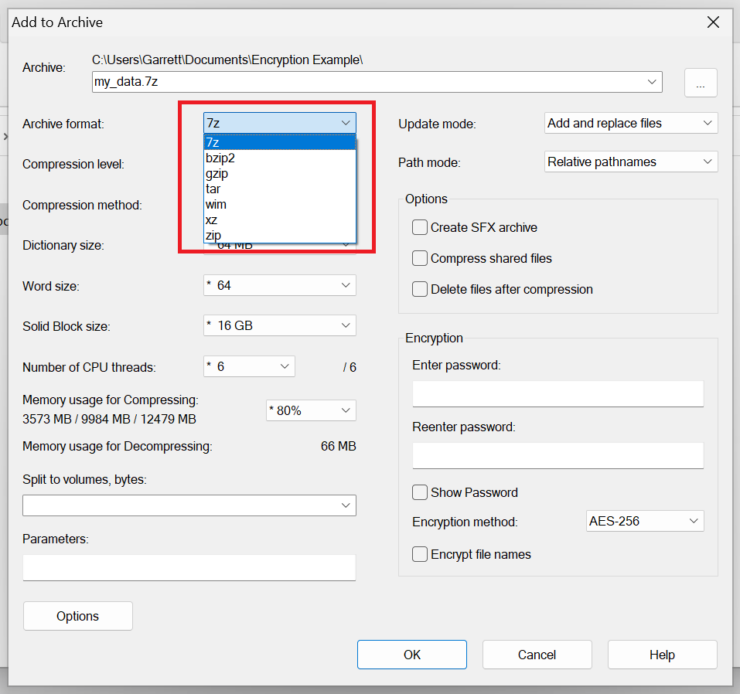
The first option in the archive creation window is for the format of the archive or compressed file.
We generally suggest using the .zip format for most purposes, it is usable on almost all operating systems without requiring special software (such as 7-zip).
If you only want to archive file(s), you can select .zip, .7z, or .tar. .tar is archive only, for .zip and .7z select the “(0) Store” option in the compression levels section.
.tar being an archive only format is commonly paired with the .bzip2 (.tar.bz), .xz (.tar.xz), and .gzip (.tar.gz) formats, and are more commonly used on Linux.
Compression Levels
Compression takes compute effort to reduce size on disk, due to time restrictions and/or compute limitations of different computers, compression algorithms have different levels of compression.
As mentioned in the previous section, if you just want to store file(s), use the “0 – Store” option, the .tar archive format will force this option.
The rest of the options have a number that is associated with the level of compression, and by extension the amount of time that it will take to compress the archive. “0 – Store” will be the absolute fastest, and “1 – Fastest” will be the fastest compression, but will not save as much size on disk as the opposite end of the compression spectrum. “9 – Ultra” will take the longest to compress, but will save the most size on disk. For the standard UU laptop for ~1 GB files, we suggest using Maximum or Ultra.

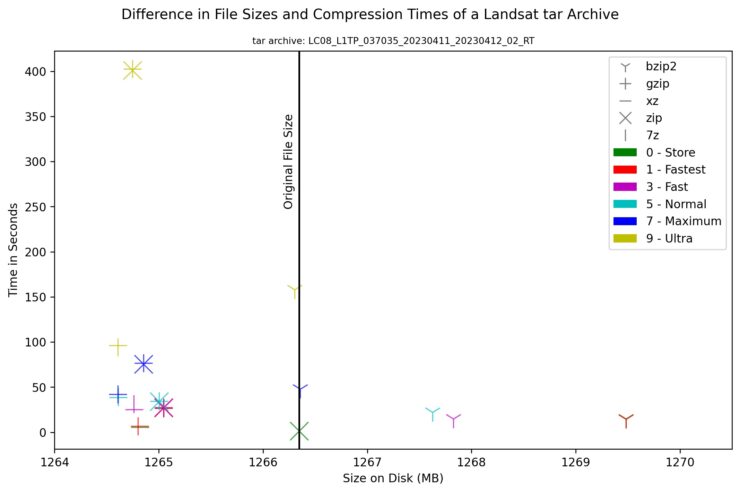
While the Ultra compression option will save the most space on disk, there are certain file formats that have compression already enabled internally, especially images. If a file format that will go into a compressed file is already compressed itself, you probably won’t save much space on disk by using the Ultra compression level, and you will waste time trying to save a few megabytes.
An example of this can be found in a change made to the way Landsat data is distributed. Landsat data is satellite imagery, the imagery portion is stored in .tif files that have a compression scheme internally, and the metadata is stored in text files. Each individual dataset takes anywhere from 950MB to 1.2GB. The datasets used to be distributed in a .tar.gz file, the .tar archived the file, and the .gz compressed the archive. They are now distributed as just .tar archives as they found the time it took to run the compression outweighed the benefits of saving a few megabytes.
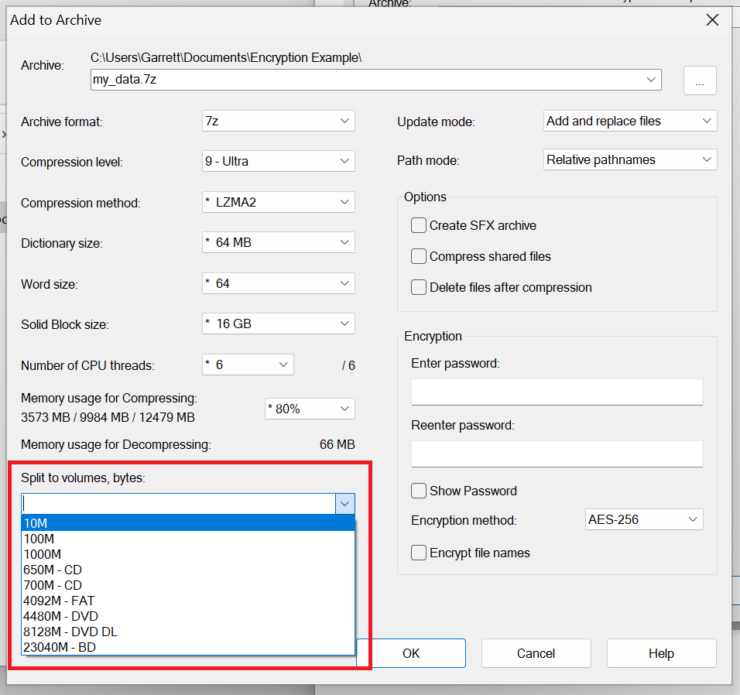
Split to volumes
The last major option to look at is splitting to volumes, this option will split your archive into a set of files that are up to a given file size, and apply a naming scheme to the different files created. This option is really helpful when you want to upload data to a cloud service, such as OneDrive. Consider you are uploading data to a cloud service, uploading a lot of small files takes longer than a few files of the same size (this is due to checks and quality systems in the upload process). However uploading a single large file of many GBs or even TBs can suddenly fail in the upload process and then you would have to restart. By splitting an archive into volumes, you can save time on many little files, and avoid large archives failing and having to restart the upload from 0.
If you need to split into volumes, we suggest either the 700M – CD or 4092 – FAT options.