Documenting Data
Documenting the data that you uploaded in Yoda is a crucial step to adding more value to the data and making it Findable, Accessible, Interoperable, and Reusable (FAIR). After you have uploaded the data, you should document it in two steps:
- Filling out the metadata form on the web portal
- Adding a README file in the data main folder (also in subfolders if necessary)
To fill in the metadata form, login to the web portal and follow the steps below:
- Go to the main folder of the dataset that you want to add metadata there and click on the metadata button

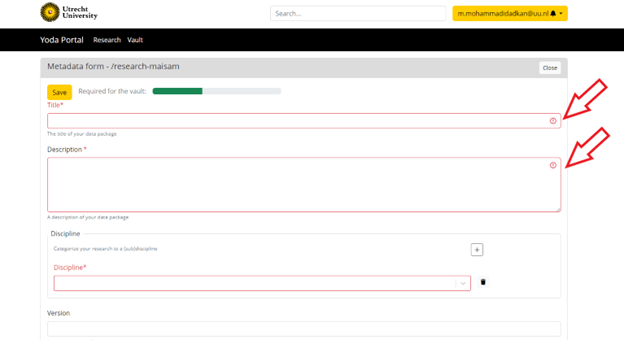
- In the opened form, you will see many fields that you have to fill in. A couple of them are labeled with a red frame which means they are mandatory for publishing or archiving data later. Keep in mind that you do not need to fill in all the fields at the beginning and you can update them any time before publishing or archiving the dataset.

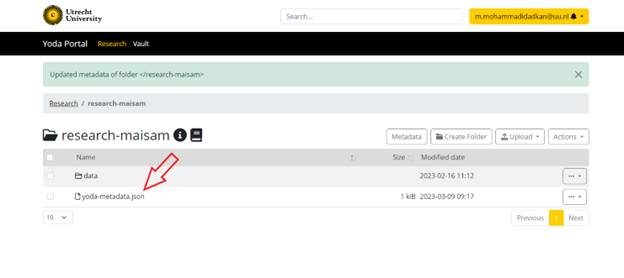
- When you have filled in at least one field and saved the form, a yoda-metadata.json file will be created in the folder you are in. This file contains all the information that you have filled in the form.

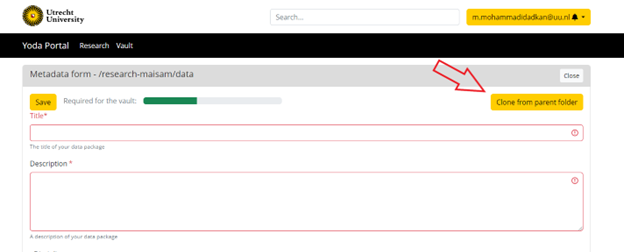
- You can also add metadata to the subfolders if necessary. If there is common information between the main folder metadata and the current folder, you can use the ‘clone from parent folder’ button to import the information from the main metadata form and modify it whenever needed.

An important aspect of data documentation is providing a README file that includes all relevant information about the dataset. The README file should be reviewed to assess the quality of the dataset and to help others understand and reuse it. The Geo Data Team offers guidance and templates for writing a README, which you can access through the link below:
https://github.com/UtrechtUniversity/README-Templates

